Want to makeover your brick home but not sure if you want limewash vs whitewash? Read on to discover the differences between limewash vs whitewash, so you can pick the best technique for your home!
I’ll be honest. I’ve heard of the terms limewash and whitewash before but never knew what made them different!
Both techniques are water-based and are great for updating brick exteriors and fireplaces because they allow some of the natural brick to show through.
However, each technique has its distinct pros and cons.
Is one better than the other for your upcoming brick makeover?
Read on to discover everything you need to know about limewash vs whitewash.
- What is limewash?
- Pros and cons of limewash
- My limewash recommendation
- How to apply limewash
- What is whitewash?
- Pros and cons of whitewash
- My whitewash recommendation
- How to apply whitewash
- Alternative option – German smear
- Which is the better technique for your home?
*Disclosure: This post may contain affiliate links that are at no additional cost to you. I may earn a small commission. Read the full privacy policy here.

Table of Contents
Related: 6 Surprising Things I Learned About Limewash Paint
What is limewash?

What it is: Limewash is made from limestone that has been crushed, burned, and later combined with water to make putty.
How it’s made: The putty goes through an aging process. After that, it is thinned with water to create limewash paint.
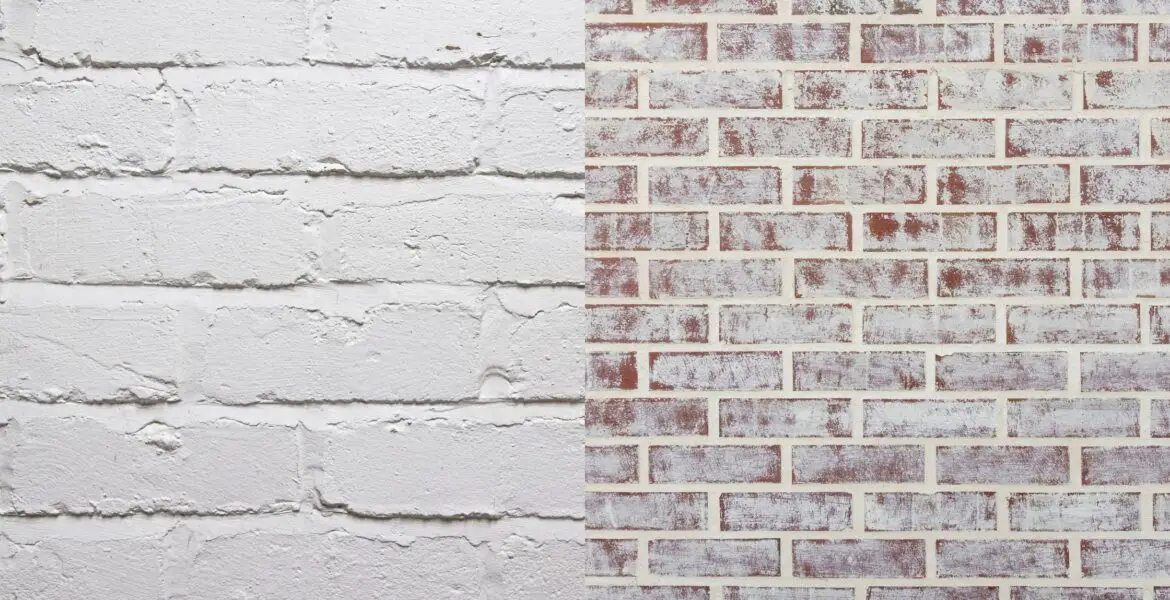
Texture: Matte finish with a chalky texture
Colors: White (this is the natural color of limestone!), taupe, gray, and brown (these are created by adding natural pigments)
Pros of limewash
- More texture than whitewash paint
- Easy to apply
- Can be removed up to 5 days after applying (this gives you some time to decide if you like it or not!)
- Resistant to odor, moisture, and fungi
- All-natural, non-toxic, and eco-friendly
- Hypoallergenic
- Sinks into porous surfaces so the texture of the natural brick doesn’t change
- Can be made and mixed at home (learn how to do this here!)
Cons of limewash
- May require several coats depending on desired look/coverage
- Expensive if you buy the pre-mixed version
- Difficult to make and mix on your own
- Color becomes much lighter after drying
- Hard to stay consistent if batches are mixed during different times
- May need touching up every 5 years or so because of erosion
- Not applicable for painted brick
My recommendations:
1. Romabio Bianco White Limewash Interior/Exterior Paint
2. Romabio Tropea Beige Limewash Interior/Exterior Paint
How do I apply limewash?
1. Clean your brick! Make sure to remove all dirt, dust, and grime using a bucket of water and cleaner.
2. Tape off your paint area to avoid spillover on walls, floors, or furniture.
3. Dampen your brick by spritzing water from a spray bottle.
4. It’s time to mix your paint! Pour the limewash paint into a bucket and then dilute it with 50% water. Mix. If you find that you need more water, you can always add more!
5. Use a masonry paintbrush to apply the paint over the brick. Start from the top to the bottom.
6. Let your paint dry for about 10-20 minutes. It should still be damp.
7. Spray more water on the brick and wipe with a rag to get a textured look.
8. Touch up any areas with more paint if needed!
What is whitewash?

What it is: A water-based paint that is mixed with water.
Purpose: Tones down natural colors of brick (and other surfaces too!) to create a naturally vintage or weathered look.
Texture: None
Colors: You can do this in any color!
Pros of whitewash
- Cheap
- Easy to apply
- Dries fast
- Gives a bright and smooth finish
- Offers more color varieties
- Will last 20-30 years with none or minimal maintenance required
Cons of whitewash
- No texture
- May require several coats depending on desired look/coverage
- Harder to remove
- Dries fast (you don’t have time to decide if you like it or not!)
- Not resistant to odor, moisture, and fungi
My recommendation: Giani Brick Transformations Kit – Whitewashed
How do I apply whitewash?
1. Just like applying limewash, you have to ensure your brick is clean. Use water, a good scrub brush, and a cleaner to remove any dust, dirt, and grime.
2. Mix the paint in a container with water and stir well. The general rule of thumb is to mix one part of paint with one part of water. However, you can adjust this according to the coverage you want.
3. Tape off all areas to avoid paint spillage.
4. Apply the paint and water mixture all over your brick.
5. Too much paint? Use a wet rag to wipe off any excess paint.
Related: Farmhouse vs Modern Farmhouse – What’s the difference and which style is better for your home?
Are there any other options besides limewash and whitewash?

Yes, there is! You can also apply German Smear all over your brick!
What is it: Spreading wet mortar over brick and then wiping some of it off before it dries.
Texture: Adds a rough and distressed texture
Pros of German Smear
- Adds texture
- Gives a rustic and “Old-World” look and feel
- Cheap
- Extremely durable
- No maintenance required
Cons of German Smear
- Exhaustive process
- Time-consuming to apply
- Very difficult to remove
- Not applicable for painted brick
Which technique should I choose for my home?
Not sure which technique to go for? Well, it depends on a few factors: the look you’re going for, your budget, and what level of commitment you want to make.
If you have a small budget and want something bright, fuss-free, and permanent, I suggest going for whitewashing.
If you have a bigger budget and want something that has texture, is natural, and easy to apply, I recommend limewashing.
Finally, if you want your brick to look rustic and distressed, consider going for the German Smear.
I hope you learned a thing or two about limewash vs whitewash vs German Smear. Let me know in the comments below which technique you’ll choose for your home!

